> For the complete documentation index, see [llms.txt](https://docs.material.security/llms.txt). Markdown versions of documentation pages are available by appending `.md` to page URLs; this page is available as [Markdown](https://docs.material.security/learn-more/risk-areas/email-threats/auto-respond.md).

# Auto-Respond

<details>

<summary>Change links and attachments behavior</summary>

Material can rewrite links and attachments to warn (speedbump) or block users. Speed-bumping links and attachments post-delivery introduces a new way to balance security and end-user productivity while reducing response time.

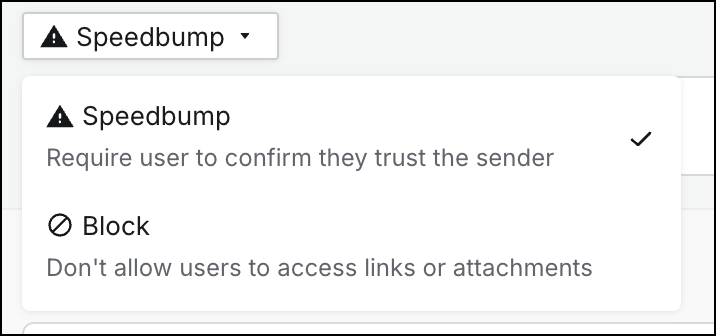
1. From the drop down, choose either a:

* **Speedbump** to require the user to confirm they trust the sender when accessing a link or attachment, or
* **Block** to disable access to links or attachments

<img src="/files/Sf9sWUMyhK1ANR5jSozQ" alt="Custom detection - Change link/attachment behavior" data-size="original">

2. Optionally, include a custom message to explain next steps, thank the user for reporting, or educate on why this email was detected. This message appears on the page that your user is redirected to. If you don't include one, they'll see the default message.

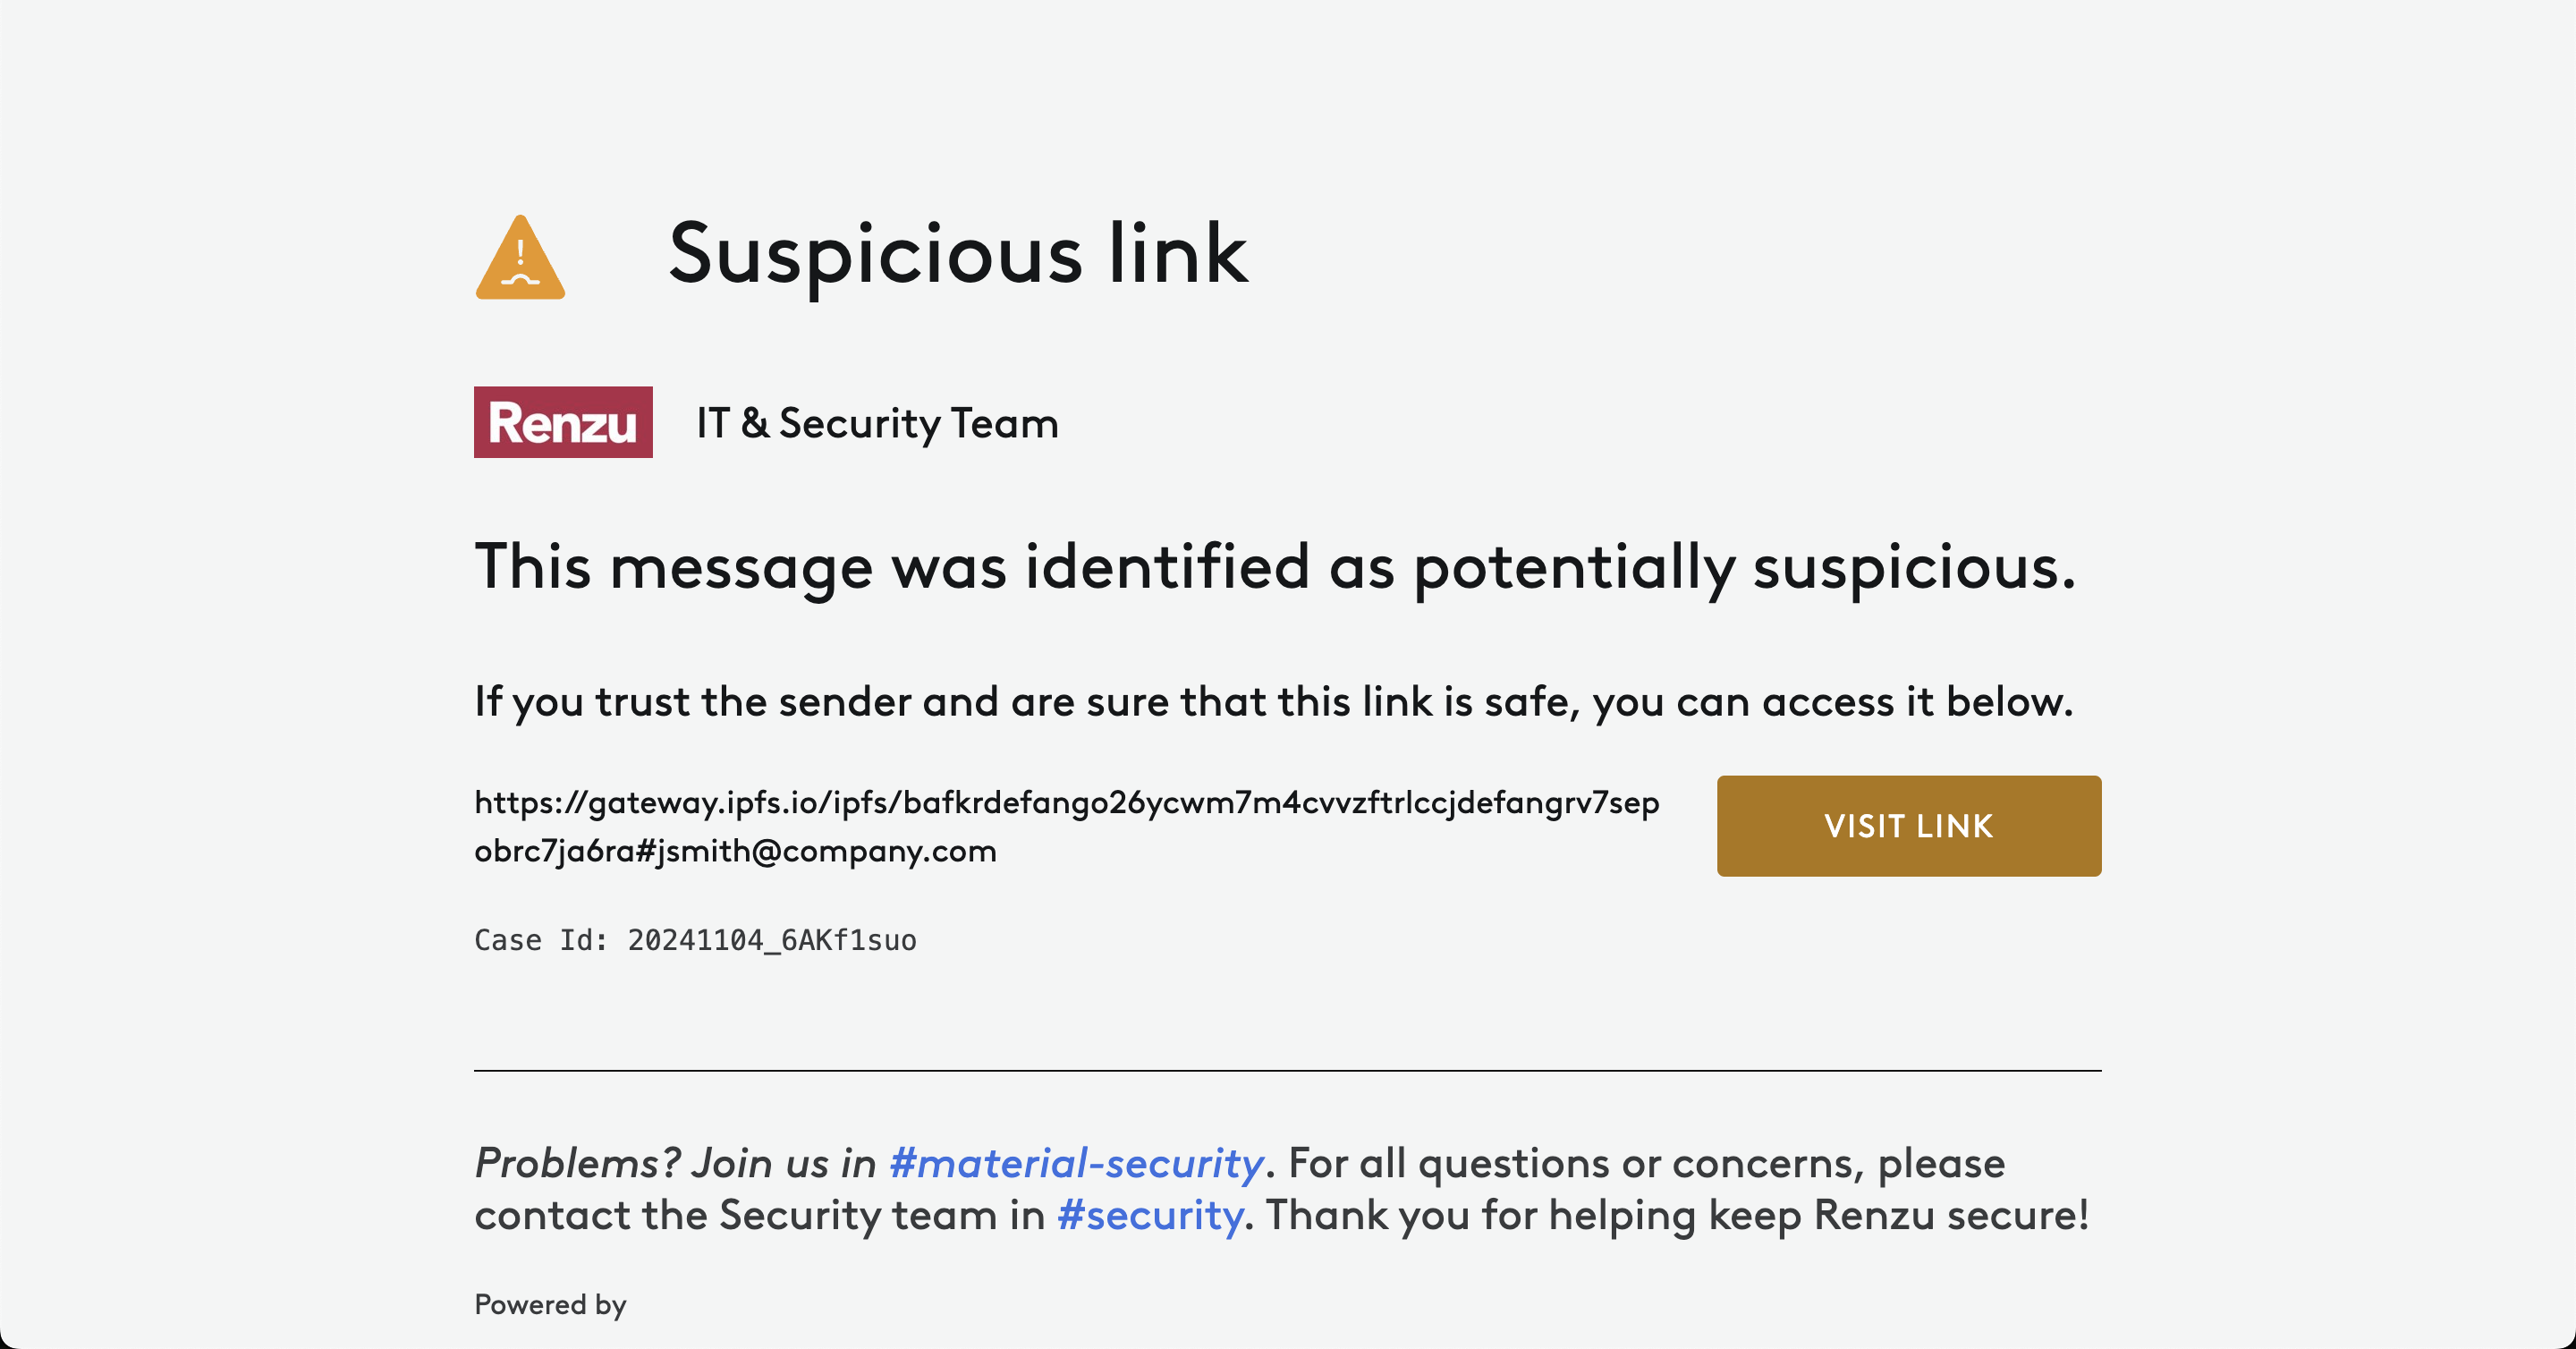
This is an example of what the users will see after they click on a speedbumped link. ![](/files/Q5yGj8cr1Exne48tBvkZ)

</details>

<details>

<summary>Resolve issues after applying remediation</summary>

After you apply remediations, you can configure the issue resolve in the same flow. If you choose this option, any [matching or similar messages](/learn-more/risk-areas/email-threats/investigate/issue-details/detected-and-similar-messages.md#auto-threat-hunt-messages) will create new issues.

There are two ways to add this to an issue:

1. Add **Resolve issue after applying remediation** to your default Email Threat responses:

<figure><img src="/files/R0DjgoIWWWd77ctY5pQ9" alt=""><figcaption></figcaption></figure>

2. Update the response in an individual issue to include **Resolve issue after applying remediation**. This [manually](/getting-started/fundamentals/investigate/issue-closure-and-manual-classification.md) resolves the issue immediately.

</details>

<details>

<summary>Response for unreviewed messages with default remediation</summary>

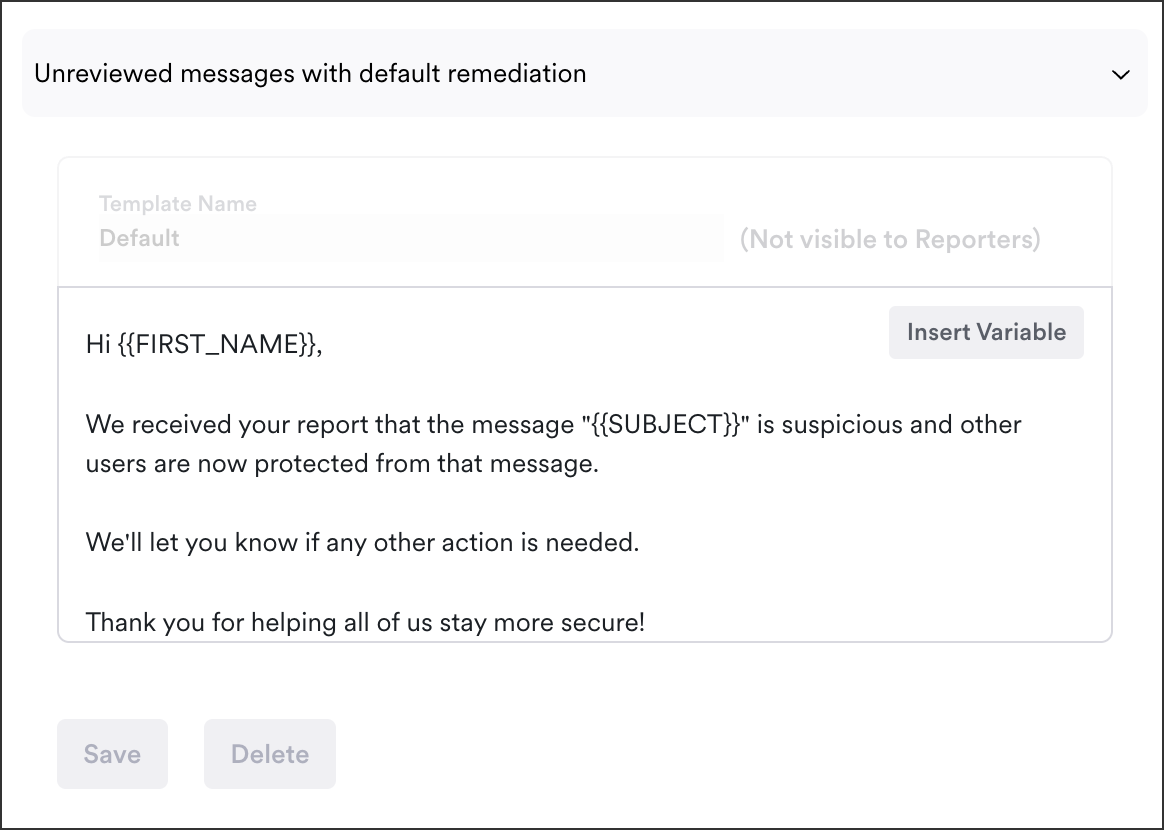
Templates you apply here will send a reply to reporters as soon as they report a suspicious email **before** it's been classified (classification displays as **none**).

As soon as the case is classified, new reporters of the same message or a similar one will receive one of the messages defined below. Learn more in [banner & template best practices](/learn-more/risk-areas/email-threats/auto-respond/banner-custom-message-and-template-best-practices.md).

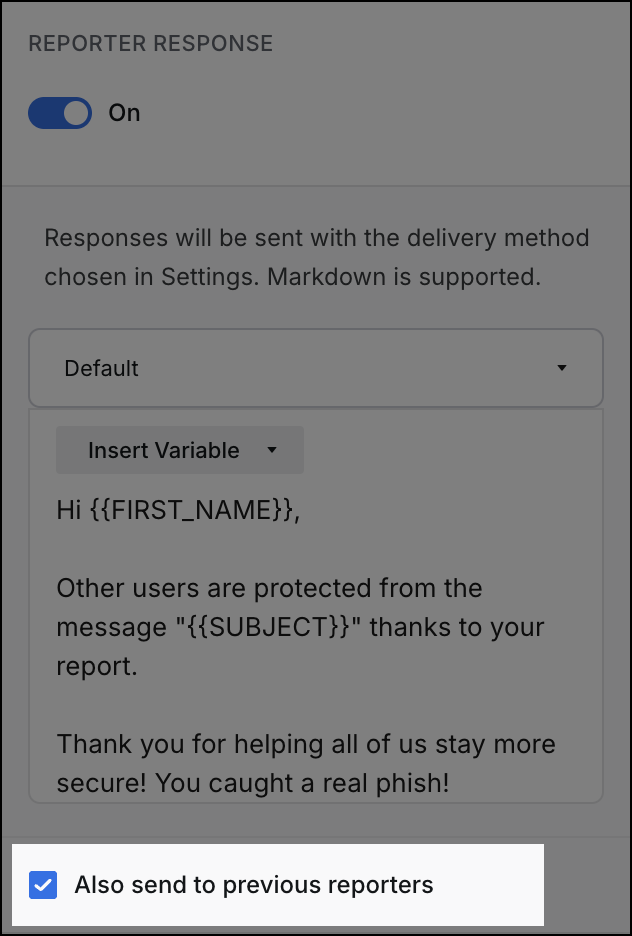
The original reporter will not receive one of these other messages by default, but if you want them to receive subsequent messages after you classify a case, from the [case detail](/learn-more/risk-areas/email-threats/investigate/issue-details.md) reporter response check the option to **Also send to previous reporters:**

<img src="/files/LL6pWGLp5vucBC7H6IXG" alt="" width="375">

</details>

You choose the default response for each detection category. The chosen behavior applies to all issues in that detection category when the issue is created.

You can then analyze any issue and [manually update the response specific to that issue](/learn-more/risk-areas/email-threats/investigate/issue-details/response-and-remediation.md) if needed. For example, if a user reports a suspicious email that you want to add more context to, you can update your response message on the issue level and that will overwrite your more generic, default message that is created by default for all user reports.

## Choose Default Responses

### Response Types

For Material Detections, User Reporting, Custom Detections, and Email Provider alerts you can set these defaults:

<table data-full-width="true"><thead><tr><th>Condition / Scenario</th><th>Preferred Action</th><th>When to Use It</th><th>Default for</th></tr></thead><tbody><tr><td><strong>High-confidence malicious</strong> (malware, phishing kit, known bad domain, spoofed internal)</td><td><strong>Block</strong></td><td>Threat is clear and severe; there is no legitimate need for the user to ever see or interact with the message.</td><td><strong>Malicious</strong></td></tr><tr><td><strong>Suspicious but possibly legitimate</strong> (lookalike domain, odd request, gift card requests)</td><td><strong>Speedbump</strong></td><td>Risky but ambiguous; user business context may validate it. You want to slow them down and add friction, not fully block.</td><td><strong>Unknown</strong></td></tr><tr><td><strong>Legitimate but misconfigured or unusual</strong> (partner using personal email, broken auth, strange but plausible)</td><td><strong>Speedbump</strong></td><td>You expect some legitimate traffic in this pattern but want users to double-check before acting.</td><td><strong>Unknown</strong></td></tr><tr><td><strong>Clearly unwanted bulk or marketing</strong> (low-value promos, repeated cold outreach, obvious-but-harmless spam)</td><td><strong>Move to Spam</strong></td><td>Not harmful, just inbox noise. Let users still retrieve it from Spam if needed, but keep it out of the primary mailbox.</td><td><strong>Malicious, Spam</strong></td></tr><tr><td><strong>Useless, confusing, or system noise</strong> (bounces, broken auto-replies, content-free messages to shared boxes)</td><td><strong>Delete</strong></td><td>No security threat and no business value. Removing it entirely reduces clutter and user confusion.</td><td>--</td></tr><tr><td><strong>Known good / normal traffic</strong></td><td><strong>No Response</strong></td><td>No meaningful risk indicators; user experience should remain uninterrupted.</td><td><strong>Safe</strong></td></tr></tbody></table>

{% hint style="success" %}
You can also add an email banner to any response to give users additional context and increase their awareness without disrupting workflow. Banners are especially effective when paired with actions like Speedbumps, as they reinforce caution and help users understand why an email was flagged.
{% endhint %}

### Update Response Defaults

For Material Detection, User Reporting, Custom Detections, and Email Provider alerts you can set these defaults:

To begin, navigate to the [settings](/learn-more/risk-areas/email-threats/detect.md#navigate-to-settings) page for the defaults you want to set. Consider the [use cases above,](#remediation-types) then review the following for more detail:

<details>

<summary>No Remediation</summary>

Issues are still created. Responses aren't applied, and the message will remain in your user's inbox with no modification. If you want your analysts to always triage issues before remediation, choose this option.

</details>

<details>

<summary>Add banner to email</summary>

Optionally, include a banner on the top of a suspicious email. Depending on the detection type, thank your user for reporting, include more information about next steps, etc. [Learn more about banner creation and best practices here](/learn-more/risk-areas/email-threats/auto-respond/banner-custom-message-and-template-best-practices.md).

</details>

<details>

<summary>Change links and attachments behavior</summary>

Material can rewrite links and attachments to warn (speedbump) or block users. Speed-bumping links and attachments post-delivery introduces a new way to balance security and end-user productivity while reducing response time.

1. From the drop down, choose either a:

* **Speedbump** to require the user to confirm they trust the sender when accessing a link or attachment, or
* **Block** to disable access to links or attachments

<img src="/files/Sf9sWUMyhK1ANR5jSozQ" alt="Custom detection - Change link/attachment behavior" data-size="original">

2. Optionally, include a custom message to explain next steps, thank the user for reporting, or educate on why this email was detected. This message appears on the page that your user is redirected to. If you don't include one, they'll see the default message.

This is an example of what the users will see after they click on a speedbumped link.

<img src="/files/kStEwPsKFQVsFj4gWvLB" alt="" data-size="original">

</details>

<details>

<summary>Delete associated calendar events</summary>

Material soft-deletes calendar events associated with the message. It does **not** move them to spam.

The invite disappears from both the organizer's and attendee's calendars. Material stores an encrypted ICS copy independently of the email provider. This copy supports restoration when the response changes.

**How restoration works:** Material extracts the ICS content from the original message and stores it in its own encrypted storage. During restoration, Material uses the calendar API to create a new calendar event from that stored ICS.

**How to verify the behavior:**

1. **Keep "Delete associated calendar events" disabled** in the global rule settings.
2. **Send a test calendar invite** from an external account to an enrolled test user.
3. **Create an issue** from the message (**Explorer** > **Messages**, select the message, then click **Create Issue**).
4. **Manually add the remediation**: On the issue detail page, enable "Delete associated calendar events".
5. **Verify deletion**: Check the test user's calendar. The event should be removed.
6. **Test restoration**: Reclassify the issue as "Safe" or remove the calendar deletion remediation.
7. **Verify restoration**: Check the test user's calendar. The event should reappear as a new event.

</details>

<details>

<summary>Move message to spam</summary>

Messages go directly to the user's spam folder. Your user can still move them from spam back into their inbox. This response applies to messages from both business domain senders and freemail senders (like Gmail and Yahoo).

Including a banner is a good choice here so they can learn why this email was moved in the first place. Include specific language so they proceed with caution. [Learn more about banner creation and best practices here.](/learn-more/risk-areas/email-threats/auto-respond/banner-custom-message-and-template-best-practices.md)

</details>

<details>

<summary>Delete messages (and associated calendar events)</summary>

Messages and any associated calendar events are deleted and inaccessible to users.

By default, Material maintains the original message so updating an issue response from 'Delete' to something else will restore the message and calendar events. However, if Mailbox Mirroring is enabled, how long restoration is possible depends on your [Mailbox Mirroring](/learn-more/administration/mailbox-mirroring.md) retention settings.

This response option can't be combined with other response types.

If a message is deleted in Material before it is assigned to an issue with this response, any associated calendar events **will not be removed**.

</details>

<details>

<summary>Resolve issues after applying remediation</summary>

After you apply remediations, you can configure the issue resolve in the same flow. If you choose this option, any [matching or similar messages](/learn-more/risk-areas/email-threats/investigate/issue-details/detected-and-similar-messages.md#auto-threat-hunt-messages) will create new issues.

There are two ways to add this to an issue:

1. Add **Resolve issue after applying remediation** to your default Email Threat responses:

<figure><img src="/files/R0DjgoIWWWd77ctY5pQ9" alt=""><figcaption></figcaption></figure>

2. Update the response in an individual issue to include **Resolve issue after applying remediation**. This [manually](/getting-started/fundamentals/investigate/issue-closure-and-manual-classification.md) resolves the issue immediately.

<figure><img src="/files/KofhjzwHAwJr2BV3G12R" alt=""><figcaption></figcaption></figure>

</details>

{% hint style="warning" %}
For Material Detections, we recommend applying the recommended Remediation (choose this option in the Material Detection [settings](/learn-more/risk-areas/email-threats/detect.md#navigate-to-settings)); [learn more here](#material-detected-responses-and-remediation).
{% endhint %}

***

## User Reporting Reporter Acknowledgements

Sending a follow-up message ensures users are informed of actions taken, reinforces security awareness, and confirms that their report was valued. It also provides guidance on any additional steps they should take, fostering a proactive security culture and improving response to future incidents.

To navigate to user reporting default settings:

1. From the toolbar, click **Settings.**
2. Expand **Email Threats.**
3. Click **User Reporting**.

In the Reporter Acknowledgement settings, leverage templates to quickly and consistently respond. You can also use variables to further customize responses:

<figure><img src="/files/ZG9ZMB5r4ZBZO8rxPkjE" alt="email" width="563"><figcaption><p>Reporter Acknowledgement</p></figcaption></figure>

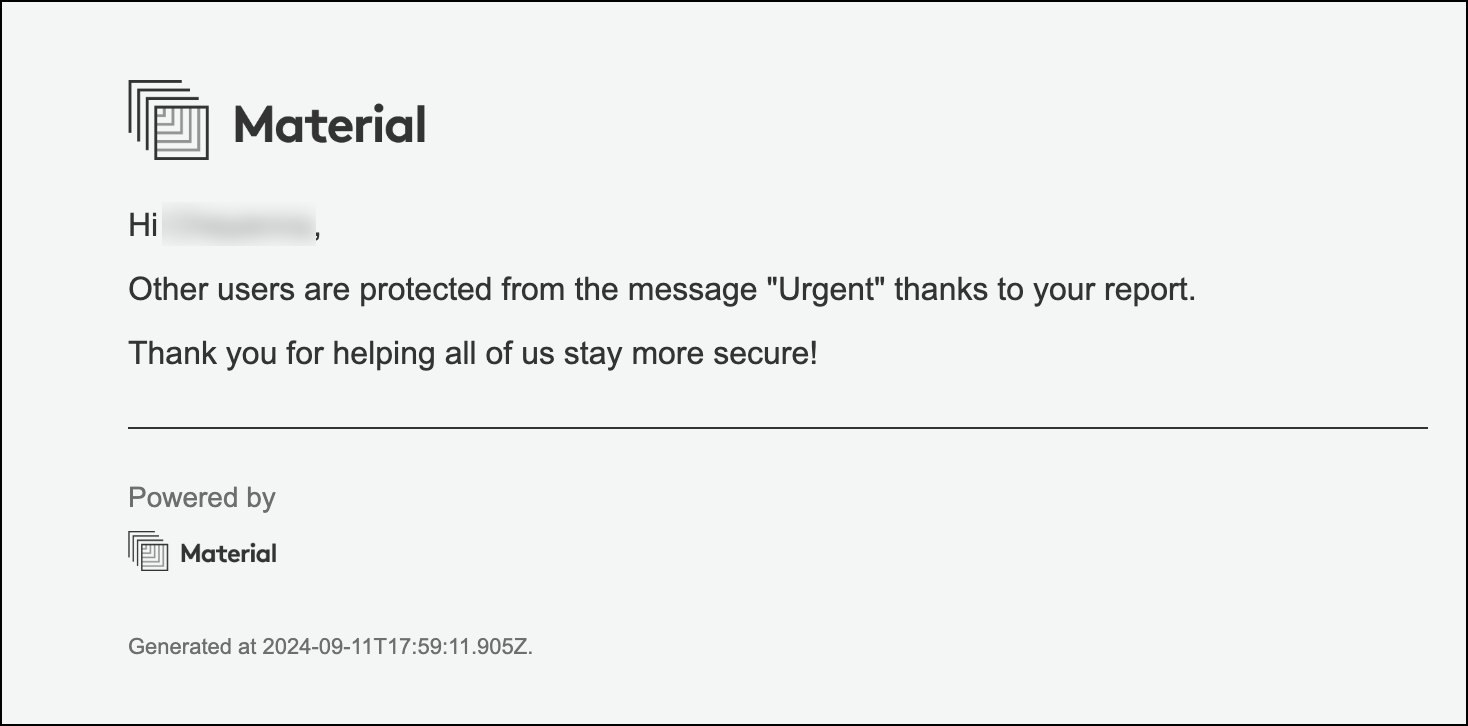
This is an example of a report acknowledgement, auto-sent in response to a user report:

<figure><img src="/files/pmHFzSDdFONDlotQPZgB" alt="" width="375"><figcaption><p>Reporter Acknowledgement</p></figcaption></figure>

If you don't write anything custom, we send the header/footer and base template.

<details>

<summary>Response for unreviewed messages with default remediation</summary>

Templates you apply here will send a reply to reporters as soon as they report a suspicious email **before** it's been classified (classification displays as **none**).

As soon as the case is classified, new reporters of the same message or a similar one will receive one of the messages defined below. Learn more in [banner & template best practices](/learn-more/risk-areas/email-threats/auto-respond/banner-custom-message-and-template-best-practices.md).

The original reporter will not receive one of these other messages by default, but if you want them to receive subsequent messages after you classify a case, from the [case detail](/learn-more/risk-areas/email-threats/investigate/issue-details.md) reporter response check the option to **Also send to previous reporters:**

![](/files/LL6pWGLp5vucBC7H6IXG)

</details>

<details>

<summary>Response for exempt messages from a trusted sender</summary>

These responses are sent to for messages reported that come from a trusted sender you established in [VIP Impersonation Settings](/learn-more/risk-areas/email-threats/detect/vip-impersonation.md) or in [Issue Exemptions](/learn-more/risk-areas/email-threats/detect/issue-exemptions.md).

</details>

<details>

<summary>Response for messages marked safe</summary>

These responses are sent to anyone who reports a message that falls into an issue classified as safe in the [issue detail](/learn-more/risk-areas/email-threats/investigate/issue-details.md) view.

</details>

<details>

<summary>Response for messages marked malicious</summary>

These responses are sent to anyone who reports a message that falls into an issue classified as malicious in the [issue detail](/learn-more/risk-areas/email-threats/investigate/issue-details.md) view.

</details>

<details>

<summary>Response for messages marked spam</summary>

These responses are sent to anyone who reports a message that falls into an issue classified as spam in the [issue detail](/learn-more/risk-areas/email-threats/investigate/issue-details.md) view.

</details>

{% hint style="success" %}
Also review the [Template and Response Workflow here](/learn-more/risk-areas/email-threats/auto-respond/banner-custom-message-and-template-best-practices.md#the-template-and-response-workflow).
{% endhint %}

***

{% hint style="info" %}
**Currently deploying?**

Click here to return to the [Enable Email Threat Protection](/getting-started/deployment-guides/your-first-30-days/6-enable-email-remediation/configure-user-reporting.md#step-two-confirm-response-and-remediation-defaults) guide.
{% endhint %}


---

# Agent Instructions
This documentation is published with GitBook. GitBook is the documentation platform designed so that both humans and AI agents can read, navigate, and reason over technical content effectively. Learn more at gitbook.com.

## Querying This Documentation
If you need additional information that is not directly available in this page, you can query the documentation dynamically by asking a question.

Perform an HTTP GET request on the current page URL with the `ask` query parameter, and the optional `goal` query parameter:

```
GET https://docs.material.security/learn-more/risk-areas/email-threats/auto-respond.md?ask=<question>&goal=<endgoal>
```

`ask` is the immediate question: it should be specific, self-contained, and written in natural language.
`goal` is optional and describes the broader end goal you are ultimately trying to accomplish on behalf of the user. GitBook uses it to tailor the answer towards what is most useful for that goal.

The response will contain a direct answer to the question and relevant excerpts and sources from the documentation.

Use this mechanism when the answer is not explicitly present in the current page, you need clarification or additional context, or you want to retrieve related documentation sections.