> For the complete documentation index, see [llms.txt](https://docs.material.security/llms.txt). Markdown versions of documentation pages are available by appending `.md` to page URLs; this page is available as [Markdown](https://docs.material.security/learn-more/risk-areas/email-data-security/sensitive-categories.md).

# Sensitive Categories

Sensitive Categories classify content as sensitive based on various criteria. Material scans for content in your email or files like credit card numbers or encrypted attachments, and then categorizes them as sensitive so your organization can leverage this information to monitor and derive insights about your risk profile. With this information, you can make more informed decisions about how to manage your security posture.

{% hint style="info" %}
Sensitive Categories are available for [Advanced Packages or with the ATO (Account Take Over) Resilience add-on](https://material.security/pricing). Contact support to upgrade.
{% endhint %}

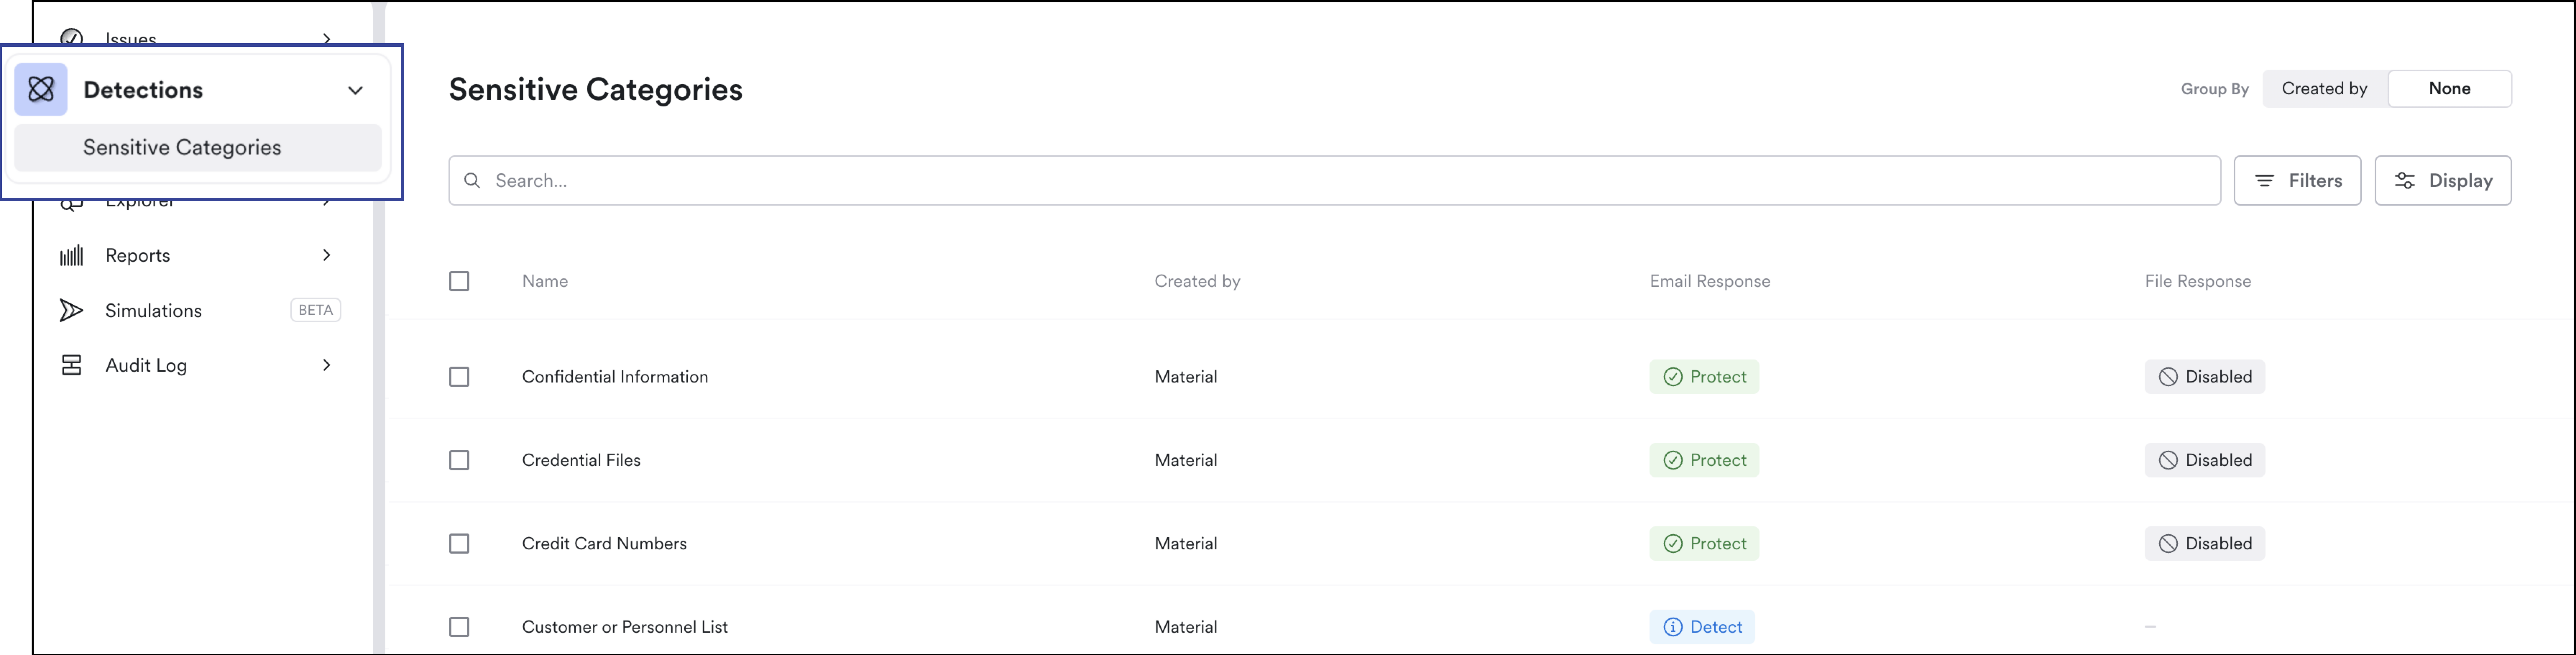
The Sensitive Categories page is located under **Detections.** It displays all existing sensitive categories and their current response settings. Material default sensitive categories are **available out of the box so you can get started right away**. You can also create custom email sensitive categories (identified as created by Admin):

<figure><img src="/files/gw1PZRwOdR3g7NRafasx" alt=""><figcaption><p>Sensitive Categories Page</p></figcaption></figure>

{% hint style="info" %}
**Sensitive Categories vs. Detections**

Detections create issues. Sensitive Categories classify data so you can leverage them in other ways later, such as in detections, but do not create issues themselves.

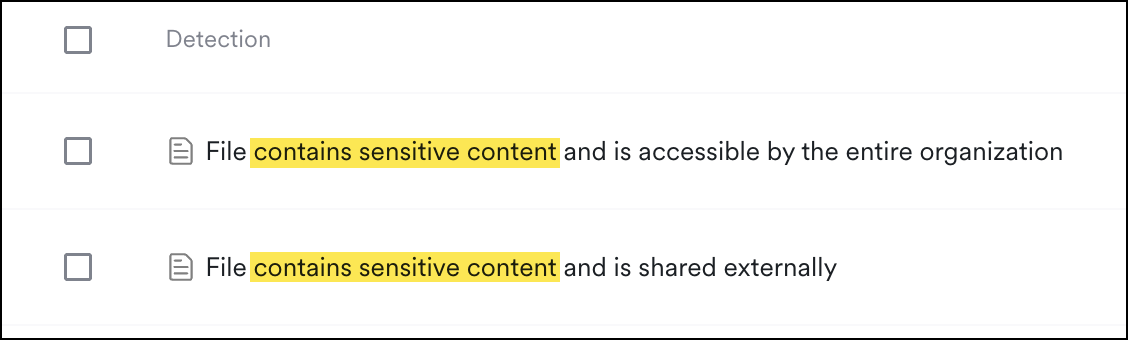
For example, the detection **File contains sensitive content and is shared externally** leverages sensitive content and the event - sharing externally - to create the full detection.
{% endhint %}

***

## Configure Response

You can customize response settings to sensitive categories at the global or tenant level.

* Email response settings for sensitive category matches include Protect, Detect only, or Disabled (described below) and can inherit from their global response.
* File response settings include Detect or Disabled (described below)

To configure responses:

1. Click on a **Sensitive Category**.
2. From the **Sensitive** **Category Detail View**, click the **Email Response** or **File Response** drop down. (Depending on the sensitive category description, there may be only an Email or only a File Response available.)
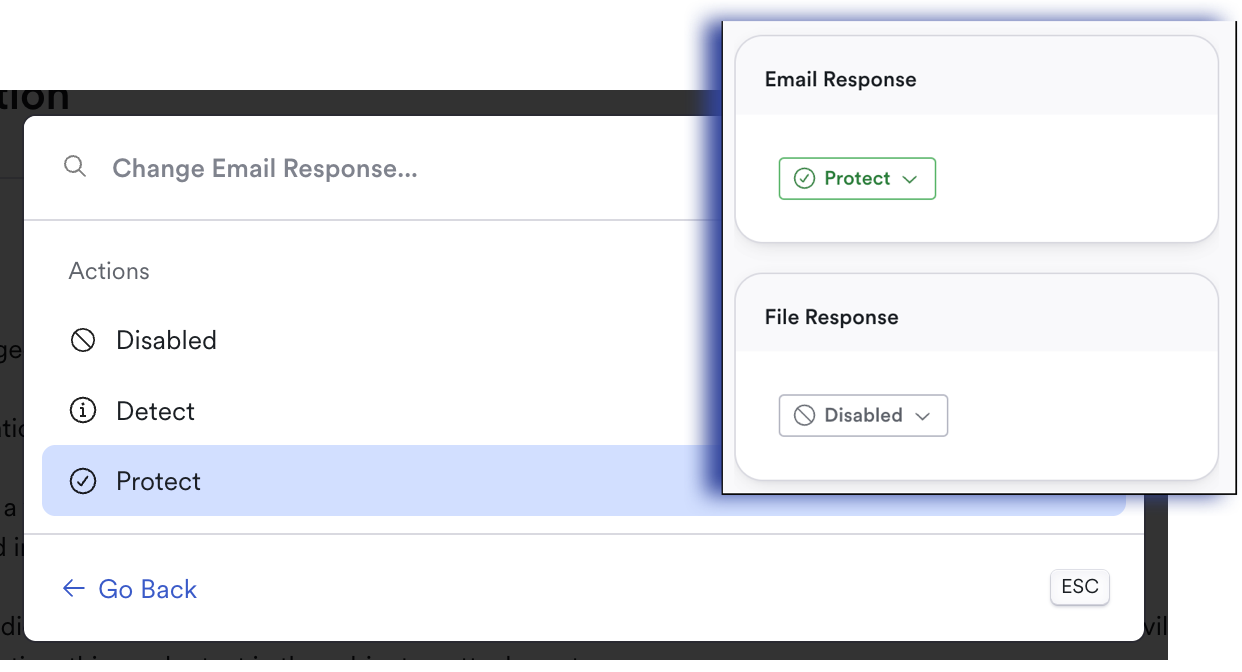
3. Select a response setting, then click **Save**:

<figure><img src="/files/c3KorYTPsaswqxtyqm3G" alt="" width="375"><figcaption><p>Set a default response</p></figcaption></figure>

* **Protect**: Redact sensitive content in messages labeled with this sensitive category. This option is only available for email content. When you set a sensitive category to protect, it applies retroactively to all messages in that sensitive category.
* **Detect**: Messages or Files matched will be categorized to that sensitive category. This option detects only to match the content to the sensitive category and does not include any redaction.
* **Disabled:** Disables the sensitive category entirely. See below :arrow\_down\_small:

#### Disable Sensitive Categories

{% hint style="warning" %}
**Disable Default Sensitive Categories Sparingly**

Material sensitive categories are designed to work out of the box with little to no customization required to see their benefit. If you do want to disable, do it with caution using the best practices described below.
{% endhint %}

The disabled action disables the sensitive category entirely. For files, this means the `category.any` operator in file search will update to exclude this sensitive category entirely.

* If you know a sensitive category will never be relevant for your organization and will only introduce noise, we recommend you disable it at the **beginning of your deployment** — not later. Categorizing your sensitive content takes time, and to effectively leverage them for detections or reports you’ll want to categorize them along the way instead of trying to figure out the sensitive categorization suddenly.
* For **emails**, if you want to avoid redacting messages then opt for the [Detect response.](#configure-response)
* For **files**, we recommend leaving all the sensitive categories [configured to](#configure-response) Detect to use for analysis or in other detections in the future. If you disable a file sensitive category then later re-enable it, you'll have the option to re-sync to retroactively categorize any existing files.

***

### Sensitive Category Descriptions <a href="#h-confidential-information" id="h-confidential-information"></a>

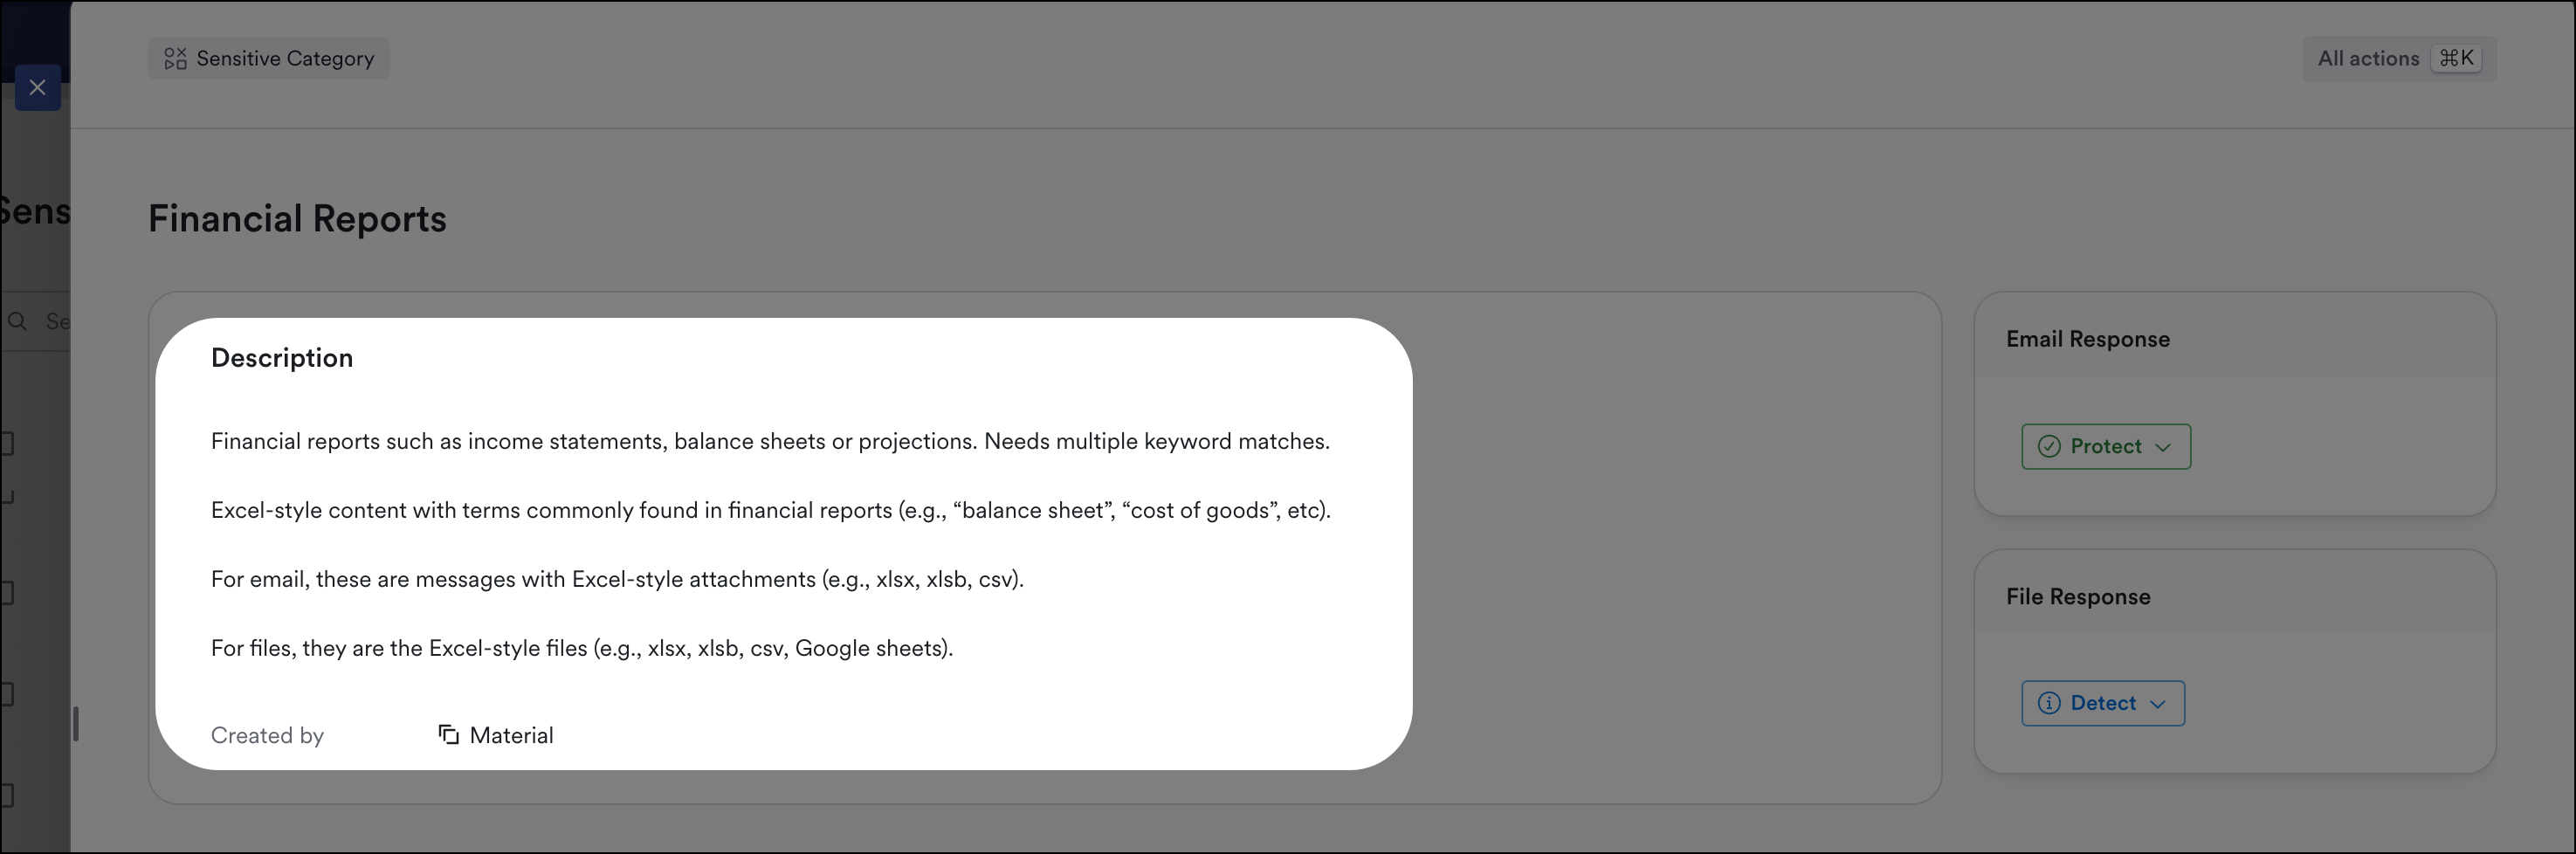
Sensitive category descriptions are located directly in the Sensitive Category detail view:

1. From the left navigation, expand **Detections** then click **Sensitive Categories**.
2. Open a sensitive category to view the description.

<figure><img src="/files/uNuhS0JI6NsjBLJmpQde" alt=""><figcaption></figcaption></figure>

### Custom Email Sensitive Categories <a href="#h-best-practices" id="h-best-practices"></a>

{% hint style="info" %}
Custom Email Sensitive Categories are available with Advanced packages. [Learn more here](https://material.security/pricing).
{% endhint %}

Custom email sensitive categories use Material's search functionality to define matching criteria. Create custom email sensitive categories to detect sensitive content that is very unique to your organization. Note, Material Sensitive Categories are ready to use out of the box so there is likely a sensitive category that already meets your use case. Create custom email sensitive categories sparingly.

{% hint style="danger" %}
**Disable unused custom email sensitive categories**

If your custom sensitive category is no longer useful for you, **disable** it as soon as possible.
{% endhint %}

1. Start with a [Message Search](/getting-started/fundamentals/explore/message-search.md). Searching helps validate your custom matching criteria by back testing against any synced messages.

{% hint style="warning" %}
Custom email sensitive categories will apply to messages moving forward, not retroactively on already synced messages. The search preview is to give you an example of what your query could match on. If there is a custom email sensitive category you would like applied, consider doing this at the beginning of your deployment.
{% endhint %}

2. Once you're satisfied with your query, click **Save As**, then **New Sensitive Category**. ![](https://lh7-rt.googleusercontent.com/docsz/AD_4nXdiC1ENuREdcToi3ocatq_h86OE8EP9ArHBexQ8hmGD1gGJCP5PfIl_X62MkOc8mkUMd9Zl1NT4ijjb6T7GW67wpUjrfaDvI7wH5JhN82FuoGzBqQJ4MQy5VA08JCw8XWm8rO8eDA?key=IYFAP6CKhlKtqodkxBC0TVRb)
3. **Name** your sensitive category. This name displays on the Sensitive Category page.
4. **Describe** the query and intention for your sensitive category for future reference.
5. The Matching Criteria field is pre-populated with your most recent query. You can continue to modify your query, and preview matching results:

<figure><img src="https://lh7-rt.googleusercontent.com/docsz/AD_4nXf8-qLp5YApk8RjEQrpLOrgQITHVjzPctPmeCGislmZz7IySzog3PAM_L9h4yTuXl81UChmHZrGQ6Y4VRcARdY31N71e254rrMyZrralIoZImuaxEsBf-I51Rb3PMRgSPX6MDPsCg?key=IYFAP6CKhlKtqodkxBC0TVRb" alt=""><figcaption><p>Save a message search as a custom email sensitive category</p></figcaption></figure>

6. Optionally, **set the response setting** for this custom sensitive category. You can set this after you save also:<br>

   <figure><img src="https://lh7-rt.googleusercontent.com/docsz/AD_4nXc9O8nlerTcDI30LhSGjqi__9q7SF9Meo8mxSr1YHu81N4kKa8NpruaBhyZka4V4DmhIojEfmfm_mdnSDMMoNLHhWL8T7_snElb8Jn-Xk2hbklw2B1pc-RkFkf-cD6b0om0xRnAYA?key=IYFAP6CKhlKtqodkxBC0TVRb" alt="" width="375"><figcaption><p>Set the default protection response</p></figcaption></figure>
7. Click **Save** to create the sensitive category.

***

### View Sensitive Categories in Issues <a href="#h-best-practices" id="h-best-practices"></a>

Issues created by Detections with `contains sensitive content` in their names can contain one or more sensitive category:

<figure><img src="/files/FZct00ZmclFnVOWdZKt5" alt="" width="375"><figcaption><p>Detections involving Sensitive Content Categories</p></figcaption></figure>

***

## Default Locking Grace Period <a href="#h-best-practices" id="h-best-practices"></a>

The Default Locking Grace Period pertains to [sensitive messages](#user-content-fn-1)[^1] specifically. It sets the amount of time an unlocked sensitive message, for example an email with a credit card number, will remain in a user's inbox before it's locked again and requires authentication to unlock.

Set the Default Locking Grace Period at the Global level. Tenants inherit the Global setting unless you configure it otherwise.

To set grace periods, from Settings expand **Email Redaction**, then click **Grace Periods.**

There may be cases where a specific Sensitive Category requires a shorter or longer locking grace period. Set these in exceptions:

* **Message**: set an exception if a message is in the inbox, unread, or sent.
* **Category**: set exceptions based on specific Sensitive Categories, for example you might want to set Social Security Numbers to a shorter grace period than the default.

You can edit this Grace Period as needed. In general, we recommend you don't make exceptions at deployment time but rather update them as you get feedback after deployment.

<details>

<summary>Set Locking Grace Period Exceptions for Groups or Accounts</summary>

You can set Locking Retrieval Period Exceptions at the Group or Account level in the Explorer:

1. From Settings, click **Back to Workspace**.
2. From the left navigation, click **Explorer**.
3. Click **Groups** or **Accounts**.
4. Next to **Protections**, click the **Edit** icon.
5. Click **Email Data Protection**.
6. Inherit applies the default setting from above. Choose the option to **set a custom or default**, then make your changes and **Save**.

Note, configure Sensitive Category exceptions that apply to all users in the Default Locking Grace Period screen.

![](/files/gl75xm7XXyHn4cDtPoGc)

</details>

{% hint style="info" %}
Learn more about [Email Redaction grace periods here](/getting-started/deployment-guides/deploy-account-takeover-resilience-ator/enable-email-redaction.md#step-two-set-grace-periods).
{% endhint %}

***

## Reports <a href="#h-best-practices" id="h-best-practices"></a>

1. From the left navigation, click **Reports**.
2. Click **Email Data Security**.

Use the **Sensitive Content** and **Email Redaction** reports to get a high level view of all the sensitive content detected over a period of time in your tenant, and any emails that were redacted and retrieved.

* Use the tabs to view this data by email sensitive category or account to drill down further.
* Use the drop downs to filter by email sensitive category
* Hover over the bars to see counts for that time period or email sensitive category.

<figure><img src="/files/E3FurY8kSsVthIZSZioI" alt=""><figcaption><p>Sensitive Category Reports</p></figcaption></figure>

{% hint style="info" %}
**Currently deploying?**

Click here to return to the [Configure Email Redaction](/getting-started/deployment-guides/deploy-account-takeover-resilience-ator/enable-email-redaction.md) guide.
{% endhint %}

[^1]: Sensitive Categories classify messages as sensitive based on various criteria, for example credit card numbers or encrypted attachments . This way, even if an attacker gets full access to a mailbox, they still can't access the restricted content inside.


---

# Agent Instructions
This documentation is published with GitBook. GitBook is the documentation platform designed so that both humans and AI agents can read, navigate, and reason over technical content effectively. Learn more at gitbook.com.

## Querying This Documentation
If you need additional information that is not directly available in this page, you can query the documentation dynamically by asking a question.

Perform an HTTP GET request on the current page URL with the `ask` query parameter, and the optional `goal` query parameter:

```
GET https://docs.material.security/learn-more/risk-areas/email-data-security/sensitive-categories.md?ask=<question>&goal=<endgoal>
```

`ask` is the immediate question: it should be specific, self-contained, and written in natural language.
`goal` is optional and describes the broader end goal you are ultimately trying to accomplish on behalf of the user. GitBook uses it to tailor the answer towards what is most useful for that goal.

The response will contain a direct answer to the question and relevant excerpts and sources from the documentation.

Use this mechanism when the answer is not explicitly present in the current page, you need clarification or additional context, or you want to retrieve related documentation sections.