> For the complete documentation index, see [llms.txt](https://docs.material.security/llms.txt). Markdown versions of documentation pages are available by appending `.md` to page URLs; this page is available as [Markdown](https://docs.material.security/getting-started/deployment-guides/deploy-account-takeover-resilience-ator/enable-identity-protection.md).

# Enable Email Identity Protection

Email Identity Protection adds an authentication step before allowing users to access password resets and other types of account verification messages. This prevents attackers from using compromised mailboxes to hijack other services.

Configure this for both Google Workspace and M365 tenants if you have multiple.

## **Step One: Configure Server-Side Routing for Google Workspace:**

Without being in the email delivery path, Material protects historical account verification messages and any new account verification messages when Email Identity Protection is enabled.

<details>

<summary>Google Workspace</summary>

#### Before you begin:

1. Ensure you have a [Google Workspace Administrator account](https://support.google.com/a/answer/2405986?hl=en)
2. In Google Workspace confirm [comprehensive Mail Storage](https://support.google.com/a/answer/3547347?hl=en) is disabled because it's incompatible with content compliance rules.
3. From Google Workspace, provision a new user account with a Gmail license.
4. Then, in Material, enable **Mailbox Syncing** and **Account Connection** for the account in step 2.
   1. From the workspace, click **Explorer**.
   2. Click **Accounts.**
   3. Find the new user account you just created in Google (it can take up to 30 minutes for the new account to sync), then **click the row**.
   4. Next to **Status**, click **Edit** (the pencil icon).
   5. Toggle **Mailbox Syncing** and **Account Connection** each to **On**: ![](https://content.gitbook.com/content/ksjM8NywYRSHu1IlfxdP/blobs/GDFY5HlJev6fx8CA303g/image.png)
   6. Click **Save**.

#### Complete configuration

1. Configure or verify the retention policy for this account in Google to avoid reaching the mailbox's storage limit and subsequent email delivery issues. Password resets and other types of account verification messages usually expire within a short timeframe so retention policies for this account could be as short as 30 days or less.
2. Select a tenant, then from the left navigation expand **Email Identity Protection**, then click **Settings**:
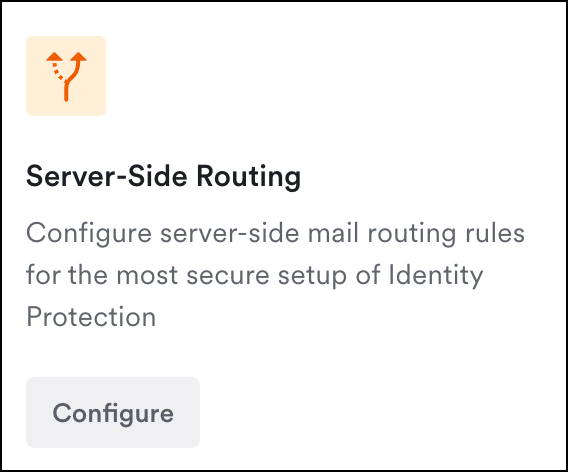
   <figure><img src="https://content.gitbook.com/content/ksjM8NywYRSHu1IlfxdP/blobs/QQ4k6dmg0Yi76BZN3PDb/image.png" alt="server-side routing setup in Email Identity Protection settings" width="284"><figcaption><p>Email Identity Protection > Settings</p></figcaption></figure>
3. Follow the server-side routing instructions on the page to complete setup.

</details>

<details>

<summary>Microsoft 365</summary>

#### Before you begin:

1. Ensure you have a Microsoft 365 Administrator account with access to [Exchange Online PowerShell](https://learn.microsoft.com/en-us/powershell/exchange/connect-to-exchange-online-powershell?view=exchange-ps).
2. In Microsoft 365, provision a new user account that can receive email and enter its email address below.
3. Then in Material, enable **Mailbox Syncing** and **Account Connection** for the account in step 2:
   1. From the workspace, click **Explorer**.
   2. Click **Accounts.**
   3. Find the new user account you just created in M365 (it can take up to 30 minutes for the new account to sync), then **click the row**.
   4. Next to **Status**, click **Edit** (the pencil icon).
   5. Toggle **Mailbox Syncing** and **Account Connection** each to **On**: ![](https://content.gitbook.com/content/ksjM8NywYRSHu1IlfxdP/blobs/GDFY5HlJev6fx8CA303g/image.png)
   6. Click **Save**.

#### Complete configuration

1. Configure or verify the retention policy for this account in Microsoft to avoid reaching the mailbox's storage limit and subsequent email delivery issues. Password resets and other types of account verification messages usually expire within a short timeframe so retention policies for this account could be as short as 30 days or less.
2. Select a tenant, then from the left navigation expand **Email Identity Protection**, then click **Settings**:

   <figure><img src="https://content.gitbook.com/content/ksjM8NywYRSHu1IlfxdP/blobs/QQ4k6dmg0Yi76BZN3PDb/image.png" alt="server-side routing setup in Email Identity Protection settings" width="284"><figcaption><p>Email Identity Protection > Settings</p></figcaption></figure>
3. Follow the server-side routing instructions on the page to complete setup.

</details>

***

## **Step Two: Optionally, Run a Trial Period**

You can enable Email Identity Protection for a few accounts or a group first to run a test period. This is a good opportunity to get feedback from users, soft launch the redaction process, and test your communication for a larger, org-wide launch.

1. From the workspace, click **Explorer**.
2. Click **Accounts** or **Groups**.
3. Check the box next an account(s) or group.
4. Click **Edit Settings**.
5. Select **Override Password Reset & App Signup Protection**, then toggle it **On**.

<figure><img src="https://3411262179-files.gitbook.io/~/files/v0/b/gitbook-x-prod.appspot.com/o/spaces%2FksjM8NywYRSHu1IlfxdP%2Fuploads%2FXLDaeiUnxFWn8ovTCczT%2FPassword%20Reset%20%26%20App%20Signup%20Protection.png?alt=media&amp;token=f0d462d6-bbb1-4b37-9579-f562e5d55927" alt="Email Identity Protection enabled for a single account or group"><figcaption><p>Email Identity Protection enabled for a single account or group</p></figcaption></figure>

***

## Step Three: Communicate with your users

Before completing Email Identity Protection configuration, let them know what to expect from the account verification process. See [Communication Templates](/getting-started/deployment-guides/communication-templates.md) for examples.


---

# Agent Instructions
This documentation is published with GitBook. GitBook is the documentation platform designed so that both humans and AI agents can read, navigate, and reason over technical content effectively. Learn more at gitbook.com.

## Querying This Documentation
If you need additional information that is not directly available in this page, you can query the documentation by asking a question.

Perform an HTTP GET request on the following URL with the `ask` and `goal` query parameters:

```
GET https://docs.material.security/getting-started/deployment-guides/deploy-account-takeover-resilience-ator/enable-identity-protection.md?ask=<question>&goal=<user_goal>
```

`ask` is the immediate question: it should be specific, self-contained, and written in natural language.
`goal` is what the user is ultimately trying to achieve, the reason they need the answer. Sharing it helps GitBook give you a better, more relevant answer. A goal is most helpful when it describes the outcome the user wants rather than restating the question. For example, with `ask=how do I create an API token`, a goal like `automate deployments from our CI pipeline` lets GitBook tailor the answer to that use case.

The response will contain a direct answer to the question and relevant excerpts and sources from the documentation.

Use this mechanism when the answer is not explicitly present in the current page, you need clarification or additional context, or you want to retrieve related documentation sections.
