> For the complete documentation index, see [llms.txt](https://docs.material.security/llms.txt). Markdown versions of documentation pages are available by appending `.md` to page URLs; this page is available as [Markdown](https://docs.material.security/getting-started/deployment-guides/deploy-account-takeover-resilience-ator/enable-email-redaction.md).
# Enable Email Redaction
Email Redaction is part of Material Security’s holistic approach to protect sensitive email data at rest. It provides an automated long-tail protection of sensitive content within messages by identifying sensitive categories of email, and redacting those sensitive emails after a configured grace period of time. Should the user need the email after it’s been redacted, they can retrieve it by passing a retrieval authentication challenge. This functionality is designed to enhance data security in the event of a breach, while minimizing disrupting users’ workflows.
## Before You Begin
1. Review the [Sensitive Categories guide](/detections/sensitive-categories.md) to understand how this function works and can be applied to emails. Then return here to configure necessary settings.
2. Complete the [Deploy Account Takeover Resilience](/getting-started/deployment-guides/deploy-account-takeover-resilience-ator.md) guide.
## Step One: Set Grace Periods
Grace periods are the amount of time a message will remain unlocked once retrieved[^1]. Once the grace period expires, users must unlock the message again.
Set grace periods at the Global level, then you can set each of your tenants to inherit the same settings or customize that tenant specifically.
{% hint style="success" %}
**Grace Period Optimization**
* Begin with longer grace periods **greater than 6 months**, then slowly decrease them to minimize friction.
* Explicitly create a user group that gets a more lax grace period (e.g. executives)
Starting too short, too quickly can lead to user frustration. Gradually reduce the grace period over time to gauge user adaptation.
{% endhint %}
To set grace periods:
1. From the left navigation, expand **Email Redaction**, expand **Settings**, then click **Grace Periods**:
2. Configure these three settings:
{% tabs %}
{% tab title="Default Locking Grace Period" %}
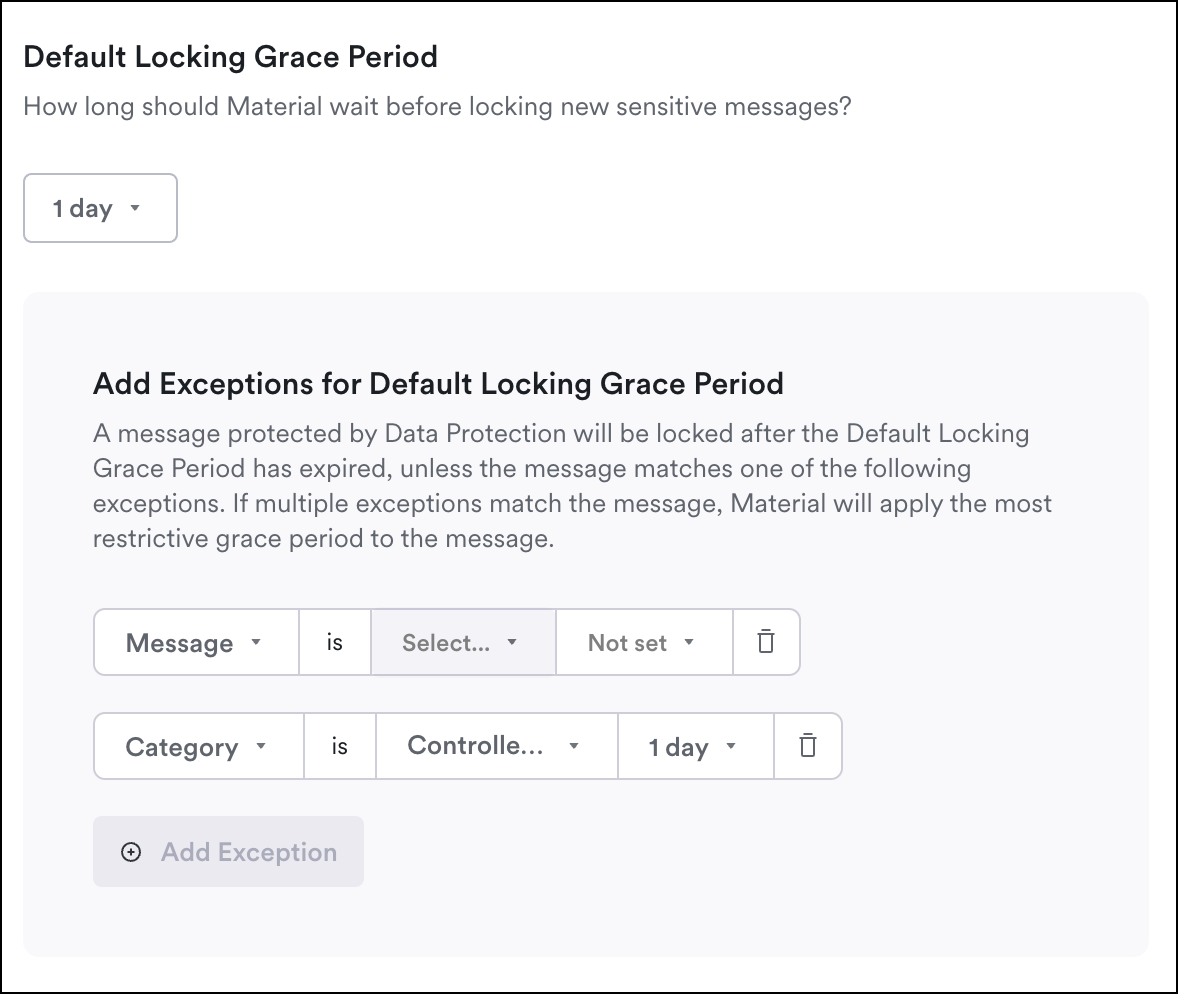
The Default Locking Grace Period pertains to [sensitive messages](#user-content-fn-2)[^2] specifically. It sets the amount of time an unlocked sensitive message, for example, an email with a credit card number, will remain in a user's inbox before it's locked again and requires authentication to unlock.
:bulb: [Learn about Material Sensitive Categories here](/detections/sensitive-categories.md).
Set the Default Locking Grace Period at the Global level. Tenants inherit the Global setting unless you configure it otherwise.
There may be cases where a specific Sensitive Category requires a shorter or longer locking grace period. Set these in exceptions:
* **Message**: set an exception based on the message's location in sub-folders.
* **Category**: set exceptions based on specific Sensitive Categories, for example you might want to set Social Security Numbers or credit card numbers to a shorter grace period than the default.
You can edit this Grace Period as needed. Changes take effect immediately. In general, we recommend you don't make exceptions at deployment time but rather update them as you get feedback after deployment.
Email Redaction > Settings > Grace Periods
{% endtab %}
{% tab title="Retrieval Grace Period" %}
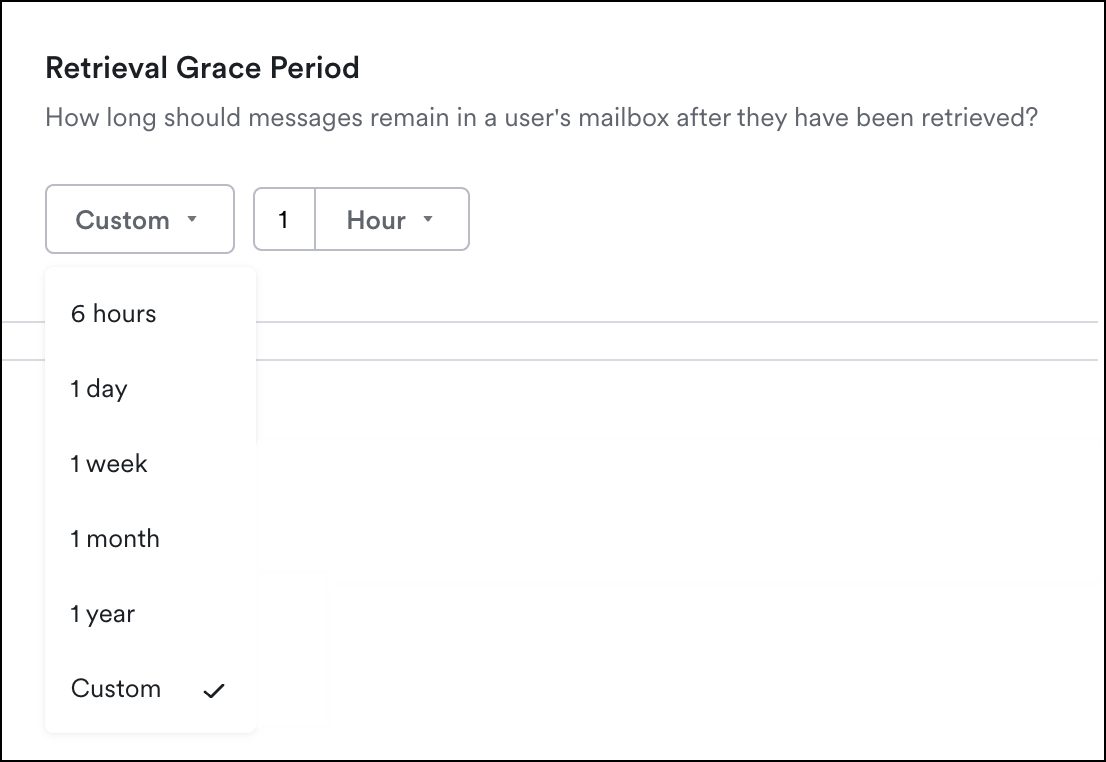
Retrieval grace periods define how long messages remain in a user's mailbox after they've been retrieved via successful authentication.
Smaller retrieval periods give users just enough time to read an email, but if they're going to need to return to it over a week or a month you should consider a longer period of time.
Once the grace period expires, messages relock.
Choose a **time period** from the drop down, or set a custom period, then click **Save**:
Email Redaction > Settings > Grace Periods
{% endtab %}
{% tab title="Retrieval Challenge Session" %}
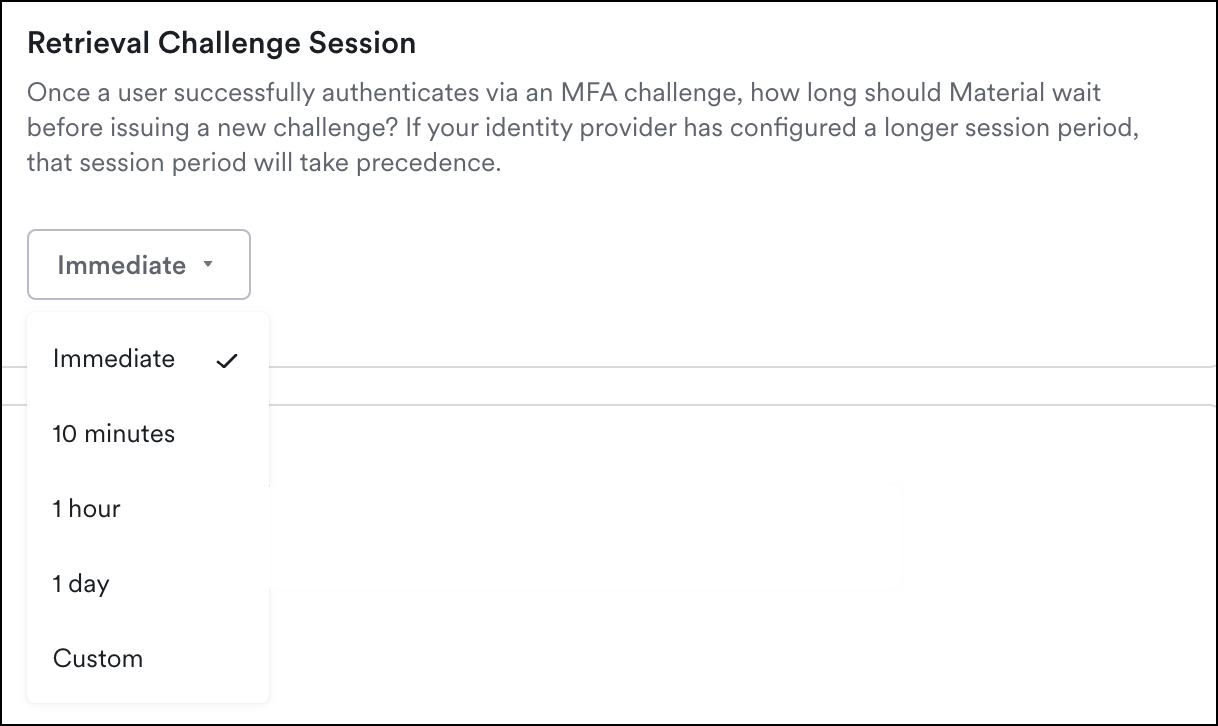
Retrieval Challenge Sessions are the amount of time Material awaits before issuing a new challenge after the user successfully authenticates via an MFA challenge. For example, 10 minutes allows users to unlock as many emails as possible in 10 minutes before challenging them again.
We recommend you keep this time period as small as possible.
Choose from an option in the drop down or customize your time limit. If you have a longer session configured in your Identity Provider — that session period takes precedence.
Email Redaction > Settings > Grace Periods
{% endtab %}
{% endtabs %}
### Grace Period Group Exceptions
Often there are groups in your organization that need different grace periods based on their roles and work. For example, your finance team probably handles a lot of invoices, so you might set an exception to the Invoice sensitive category only for them. Or you might want a custom Retrieval Challenge Session for executives.
To set grace period exceptions for a group:
1. From the left navigation, click **Explorer**, then click **Groups**.
2. Check the box next to the group, then from the bottom toolbar click **Edit Group Settings**.
3. Click the **Email Redaction** tab.
4. For each grace period you want to change, select **Override** (for example, **Override Retrieval Grace Period**), then choose a duration. Settings left on **Inherit** keep the Global or tenant setting.
5. Click **Save**.
To set sensitive category exceptions that apply to all users, use the [Default Locking Grace Period](#default-locking-grace-period) tab above.
{% hint style="success" %}
We recommend you create a user group for executives with a longer grace period than you have set globally.
{% endhint %}
***
## Step Two: Force Unlocks
Occasionally you may need to force unlock an email box, for example to support a litigation-related discovery process or other scenarios when you need to rapidly unlock a portion of messages in an inbox.
Familiarize yourself with this process here:
1. From the Explorer[^3], select the account to unlock messages for.
2. Click **All Actions** (or use the shortcut `⌘K`), then select **Force Unlock Messages**.
3. Search for and select the messages to unlock. Note: unlocking a large number of messages can take hours to days.
4. In the **Re-lock Grace Period**, choose how long to leave these messages unlocked before re-locking.
5. To receive an email when the messages are unlocked, toggle **Completion notification** on.
6. Click **Submit Request**.
Force Unlock Messages
{% hint style="warning" %}
**Include Material in your employee** [**off-boarding process**](/administration/off-board-users.md)
Organizations occasionally need to retrieve copies of email after an employee leaves a company. To support these situations, employee off-boarding must include disabling email redaction and allowing messages to be placed back in the mailbox.
When Email Redaction is enabled for an account, the original copies of sensitive messages are stored in Material’s infrastructure, not the mailbox. Anytime the user or an admin needs to access the messages, they can be restored to the mailbox either via the end user retrieval flow or Admin Force Unlock.
However, if an account has been disabled in Microsoft 365 or Google Workspace, Material can no longer place originals back in the mailbox.
Therefore, it is required that your off-boarding flow for employee accounts includes disabling email redaction and allowing all original messages to be placed back in the mailbox before the account is disabled via Microsoft 365 or Google Workspace.
Product Support can work with you to integrate these steps into your existing employee off-boarding flow.
{% endhint %}
***
## Step Three: Communicate with Users
Before enabling Email Redaction, let your users know what to expect from the process and how to retrieve sensitive emails. See [Communication Templates](/getting-started/deployment-guides/communication-templates.md) for examples.
***
## Step Four: Enable Email Redaction
Once you've configured the settings above, contact Material Support to enable Email Redaction globally or for the entire tenant.
### **Optionally: Run a Trial Period First**
Optionally, enable Email Redaction for a few accounts or a group first to run a trial. This is a good opportunity to get feedback from users, soft launch the redaction process, and test your communication for a larger, org-wide launch.
1. From the workspace, click **Explorer**.
2. Click **Accounts** or **Groups**.
3. Check the box next an account(s) or group.
4. Click **Edit Settings**.
5. Select **Override Email Redaction**, then toggle it **On**.
Enable Email Redaction for selected accounts or groups
[^1]: the user has accessed and unlocked an email or its contents through successful authentication
[^2]: Sensitive Categories classify messages as sensitive based on various criteria, for example credit card numbers or encrypted attachments . This way, even if an attacker gets full access to a mailbox, they still can't access the restricted content inside.
[^3]: in the left navigation
---
# Agent Instructions
This documentation is published with GitBook. GitBook is the documentation platform designed so that both humans and AI agents can read, navigate, and reason over technical content effectively. Learn more at gitbook.com.
## Querying This Documentation
If you need additional information that is not directly available in this page, you can query the documentation by asking a question.
Perform an HTTP GET request on the following URL with the `ask` and `goal` query parameters:
```
GET https://docs.material.security/getting-started/deployment-guides/deploy-account-takeover-resilience-ator/enable-email-redaction.md?ask=&goal=
```
`ask` is the immediate question: it should be specific, self-contained, and written in natural language.
`goal` is what the user is ultimately trying to achieve, the reason they need the answer. Sharing it helps GitBook give you a better, more relevant answer. A goal is most helpful when it describes the outcome the user wants rather than restating the question. For example, with `ask=how do I create an API token`, a goal like `automate deployments from our CI pipeline` lets GitBook tailor the answer to that use case.
The response will contain a direct answer to the question and relevant excerpts and sources from the documentation.
Use this mechanism when the answer is not explicitly present in the current page, you need clarification or additional context, or you want to retrieve related documentation sections.